
How to Deploy a Project on GCP Using Cloud Build and Cloud Run for USDZ Conversion
A comprehensive guide to setting up a fully automated CI/CD pipeline on Google Cloud Platform (GCP). Learn how to link GitHub with Cloud Build Triggers, compile container images, and deploy seamlessly to Cloud Run for the USDZ conversion microservice.

In modern 3D web development and augmented reality (AR) workflows, dynamically converting source asset files into Apple's optimized USDZ format requires an isolated, high-performance execution environment. Setting up an automated CI/CD pipeline is critical for seamlessly updating these resource-intensive rendering microservices without manual server management.
By leveraging Google Cloud Platform (GCP), developers can establish a hands-off deployment flow that triggers directly from source code updates. This technical guide will walk you through linking your GitHub repository with Cloud Build Triggers to compile container images, and deploying them seamlessly to serverless Cloud Run instances optimized for handling USDZ file conversion payloads.
Before deep-diving into the step-by-step Google Cloud Console configuration, it is essential to understand the architectural blueprint of the pipeline. Below is the production-ready cloudbuild.yaml manifest structure that defines how the system automatically handles the Docker compilation, stores the image tracking hashes, and instantly commands the deployment rollout:
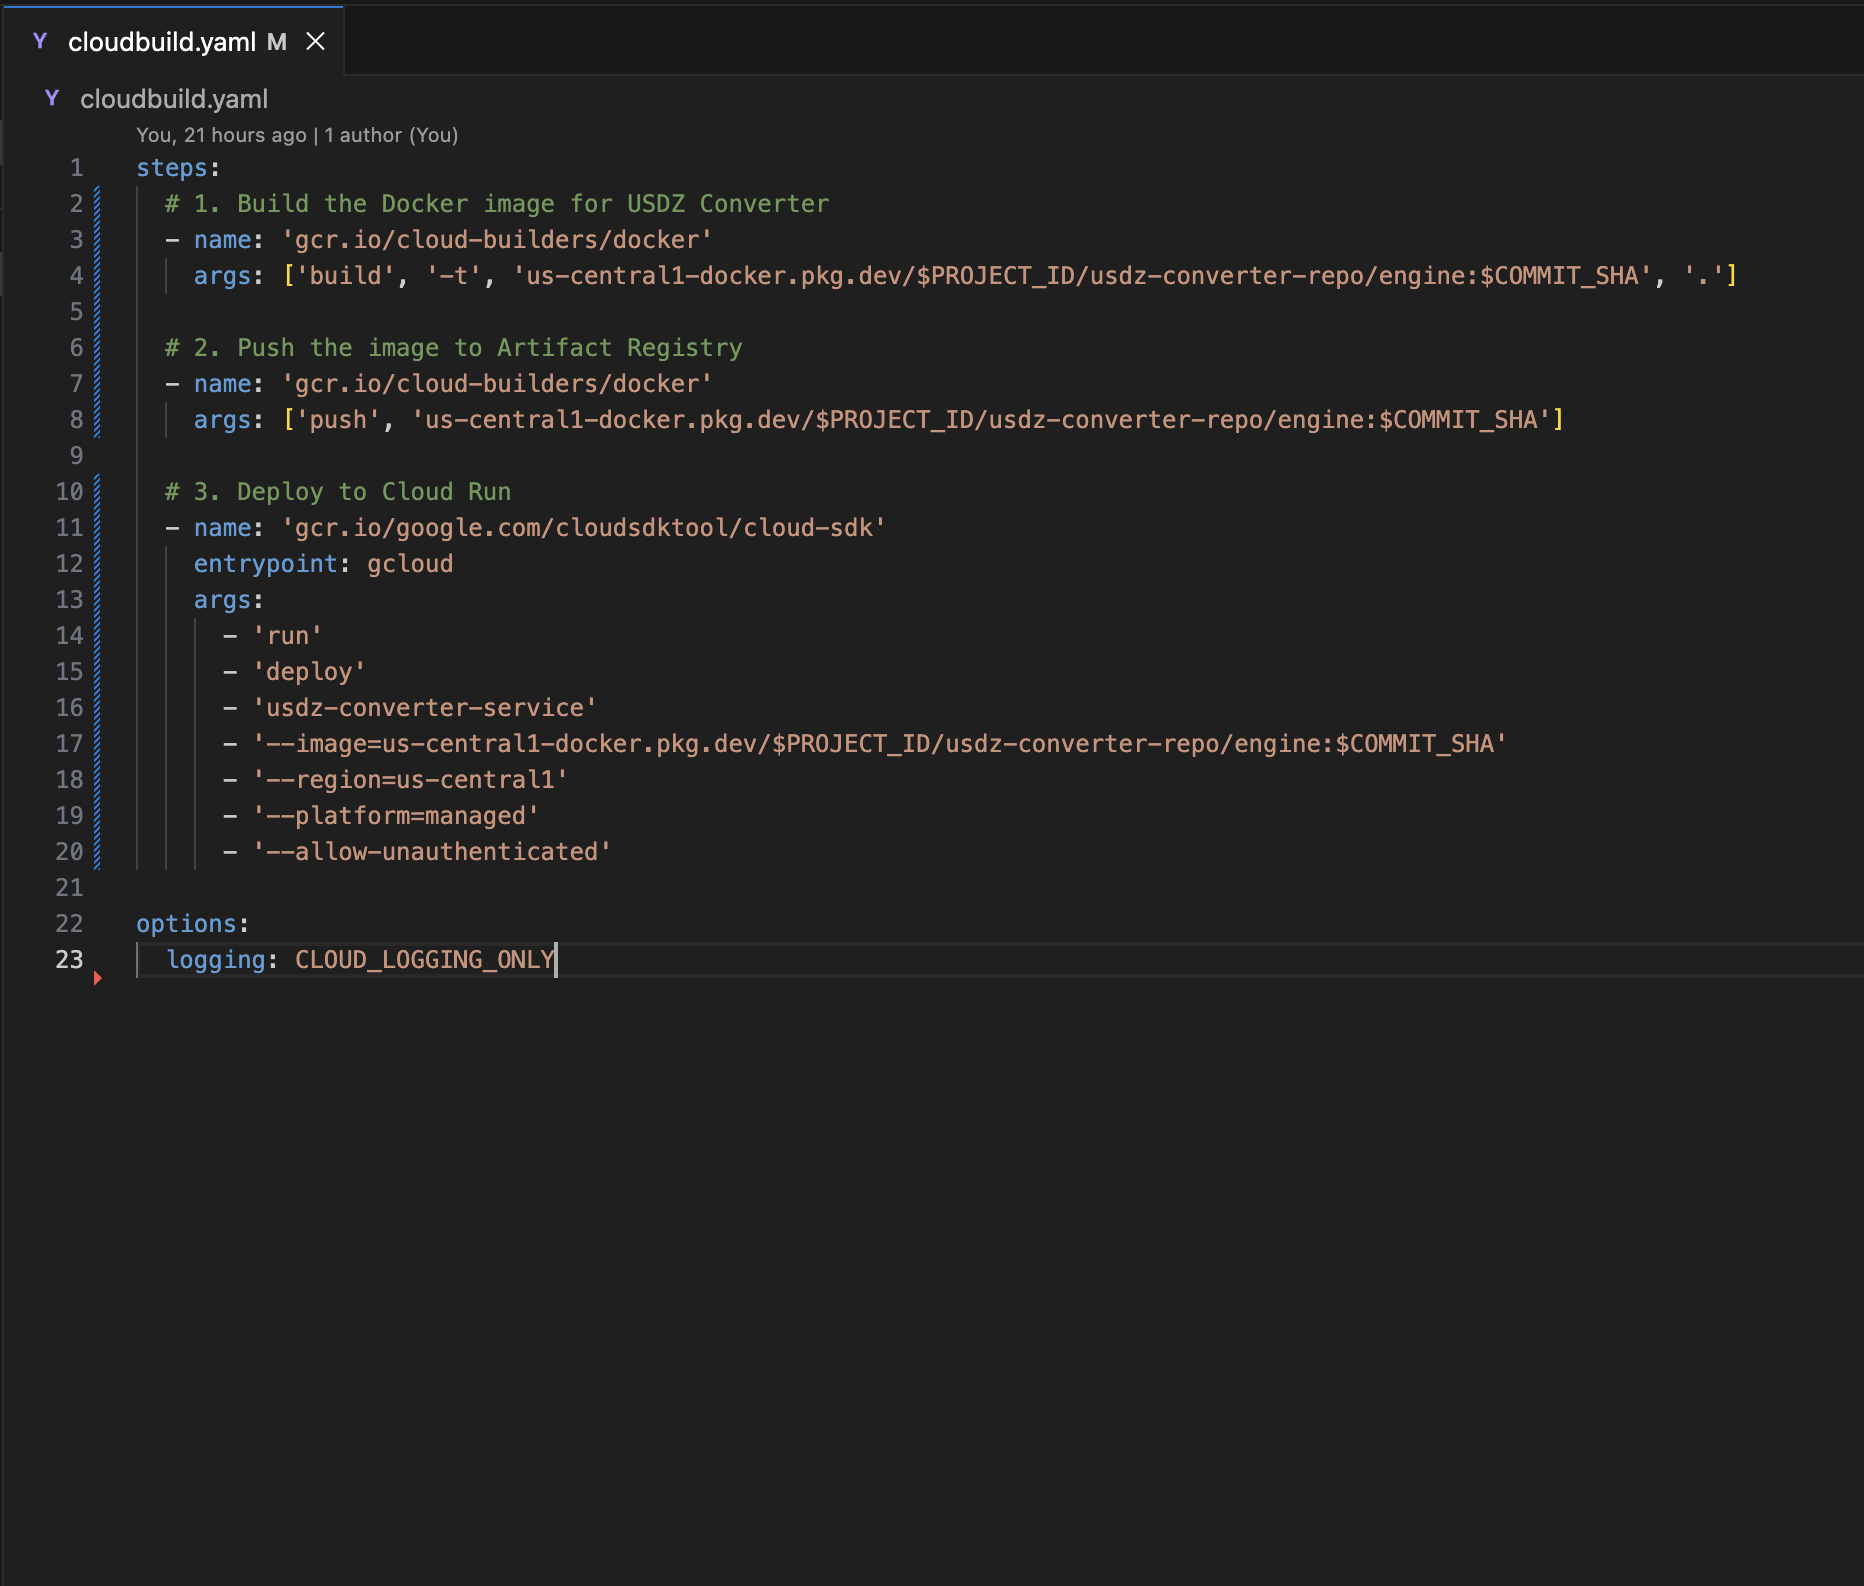
With this automation manifest checked into the root of your source repository, the entire environment deployment becomes entirely autonomous. Let's explore how to easily link this automation straight into your GCP console architecture layout.
Step 1: Create and Configure a Cloud Build Trigger
Cloud Build Triggers listen for code changes in your source control management repository and automatically kick off containerization routines.
How to access the Triggers Page:
In your GCP Console, use the main navigation menu or search bar to follow this path: Cloud Build -> Triggers -> Click on the Create trigger button at the top of the dashboard.
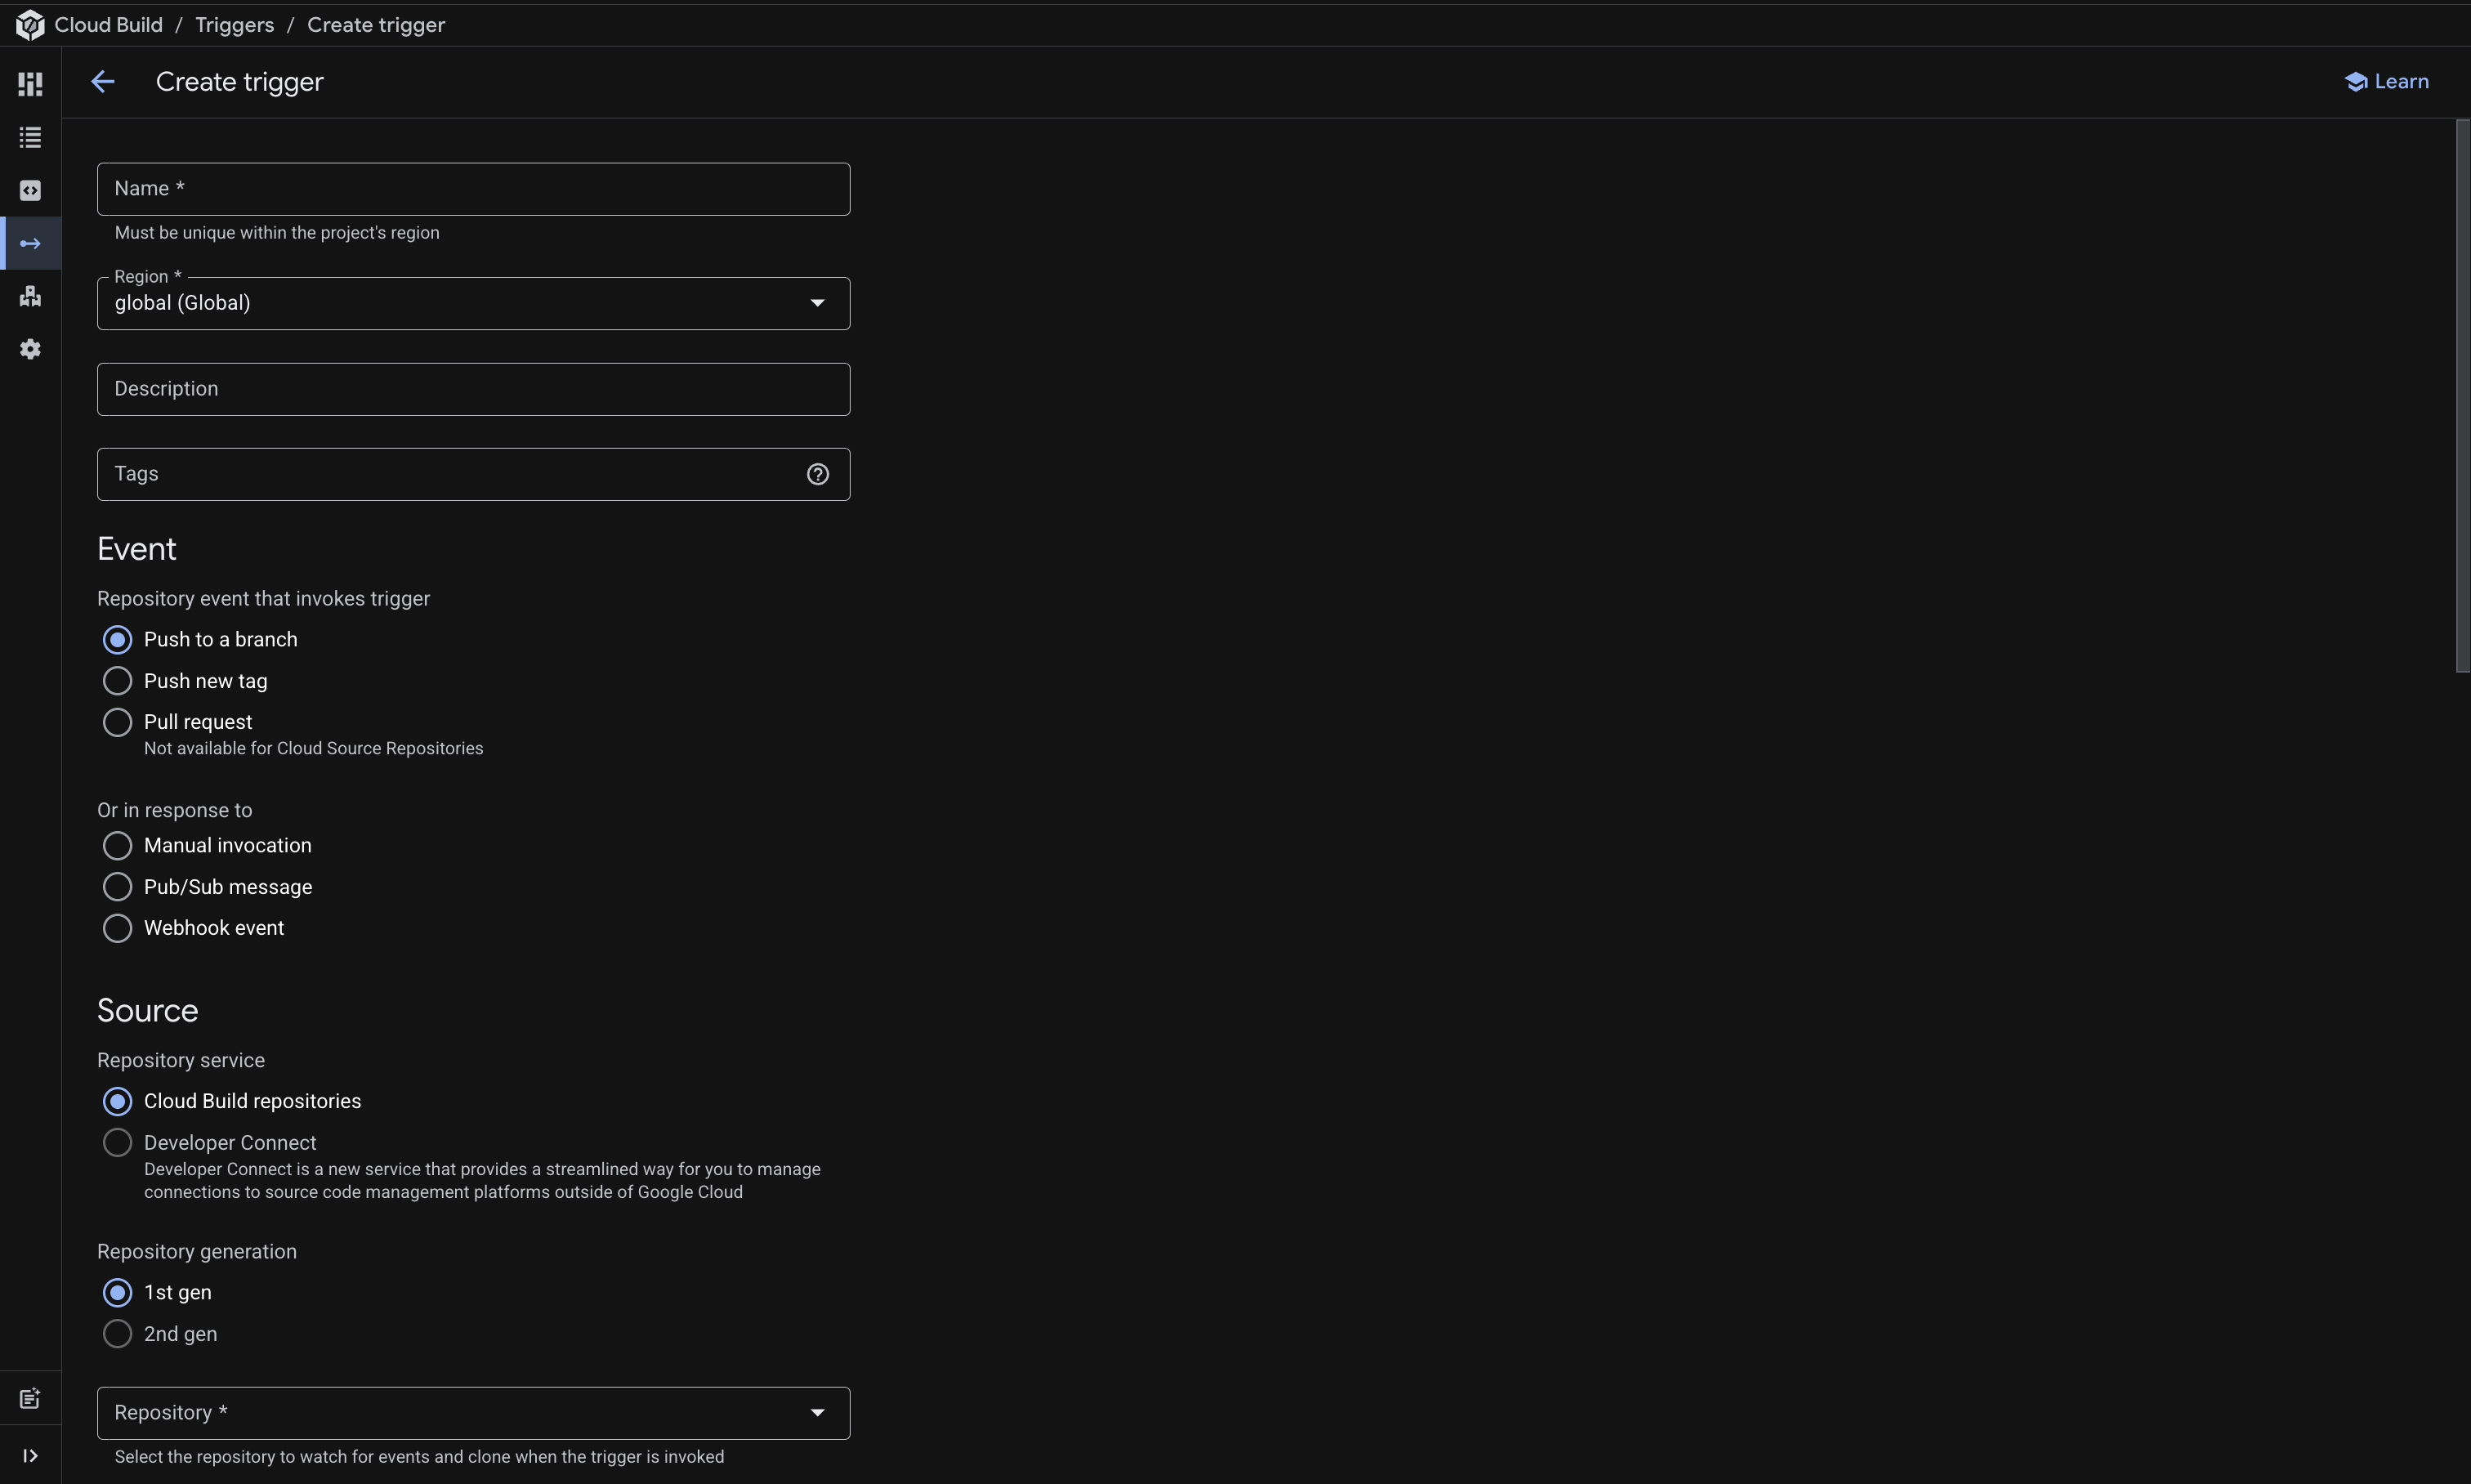
Once you enter the creation screen, the interface will appear as follows:
Step-by-step Trigger Configuration:
- Form Fields: Fill in the basic metadata for your deployment automation pipeline: Name (a unique identifier for the trigger) -> Region (select the target global region for processing) -> Description (optional summary of the trigger's purpose) -> Event (choose the specific webhook action that starts the build, such as Push to a branch).
- Repository Selection & Connection: Go to the Repository dropdown menu. If your repository is already listed, select it. If you are starting fresh and need to connect your source control for the first time, use this workflow: Click Repository -> Select Connect new repository from the bottom of the list -> A side configuration panel will slide open.
The Connect repository dialog box will guide you through the initial third-party authentication handshake:
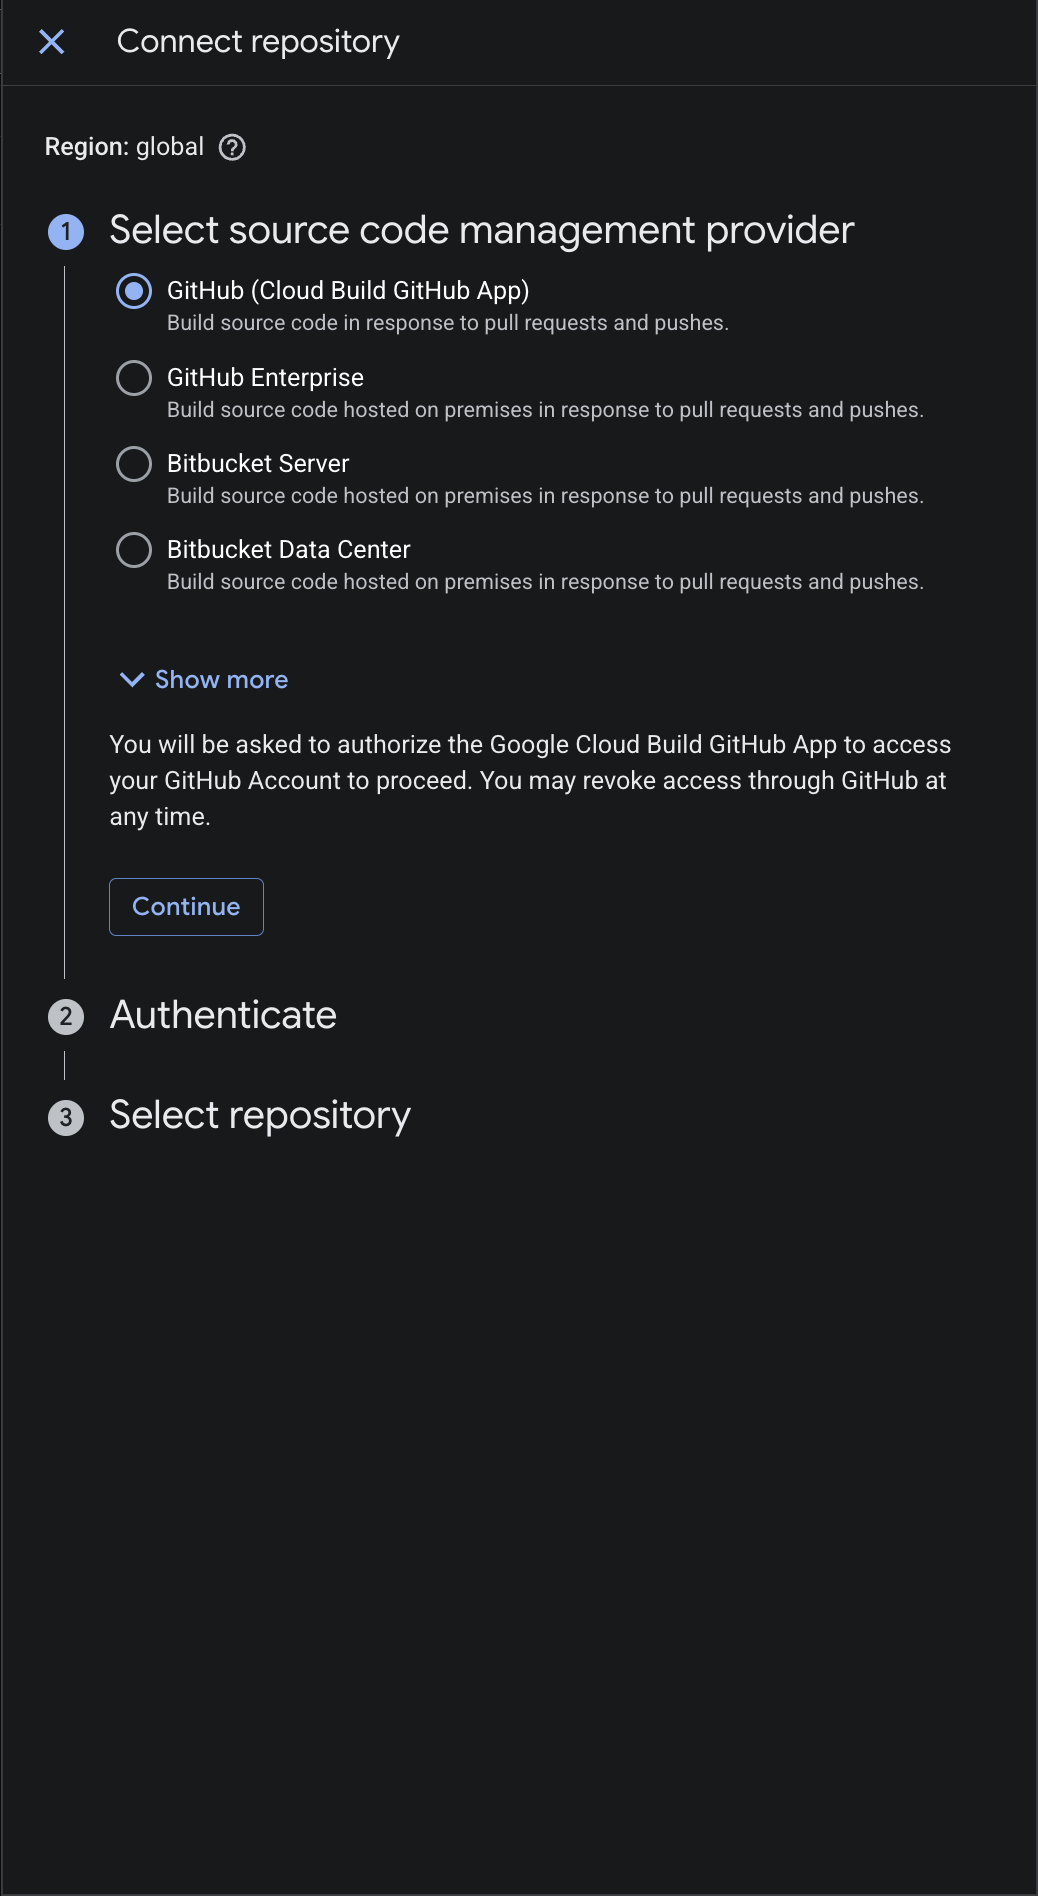
- Completing the Connection: Inside the dialog: Select source provider (e.g., GitHub (Cloud Build GitHub App)) -> Click Continue -> Authenticate your profile account credentials -> Authorize Google Cloud access -> Select the specific target project repository from your account organization -> Click Connect.
- Configuration Settings: Move to the Configuration section to define how the pipeline finds your orchestration code: Select Autodetect (this instructs the runner to automatically find either a standard
Dockerfileor acloudbuild.yamlmanifest file in your root workspace directory). - Service Account Configuration: Locate the Service account dropdown parameter -> Select the specific IAM service account that has the required security roles and permissions to run builds and push images -> Review your configurations -> Click the Create button to save the new automated runner asset.
Step 2: Execute Manual Trigger Compilation and Monitor Build History
Once your deployment trigger is configured, verify that your application compiles properly into a deployable container layer without configuration or code syntax errors.
How to execute the initial build run:
Navigate to your main Triggers dashboard management workspace layout:
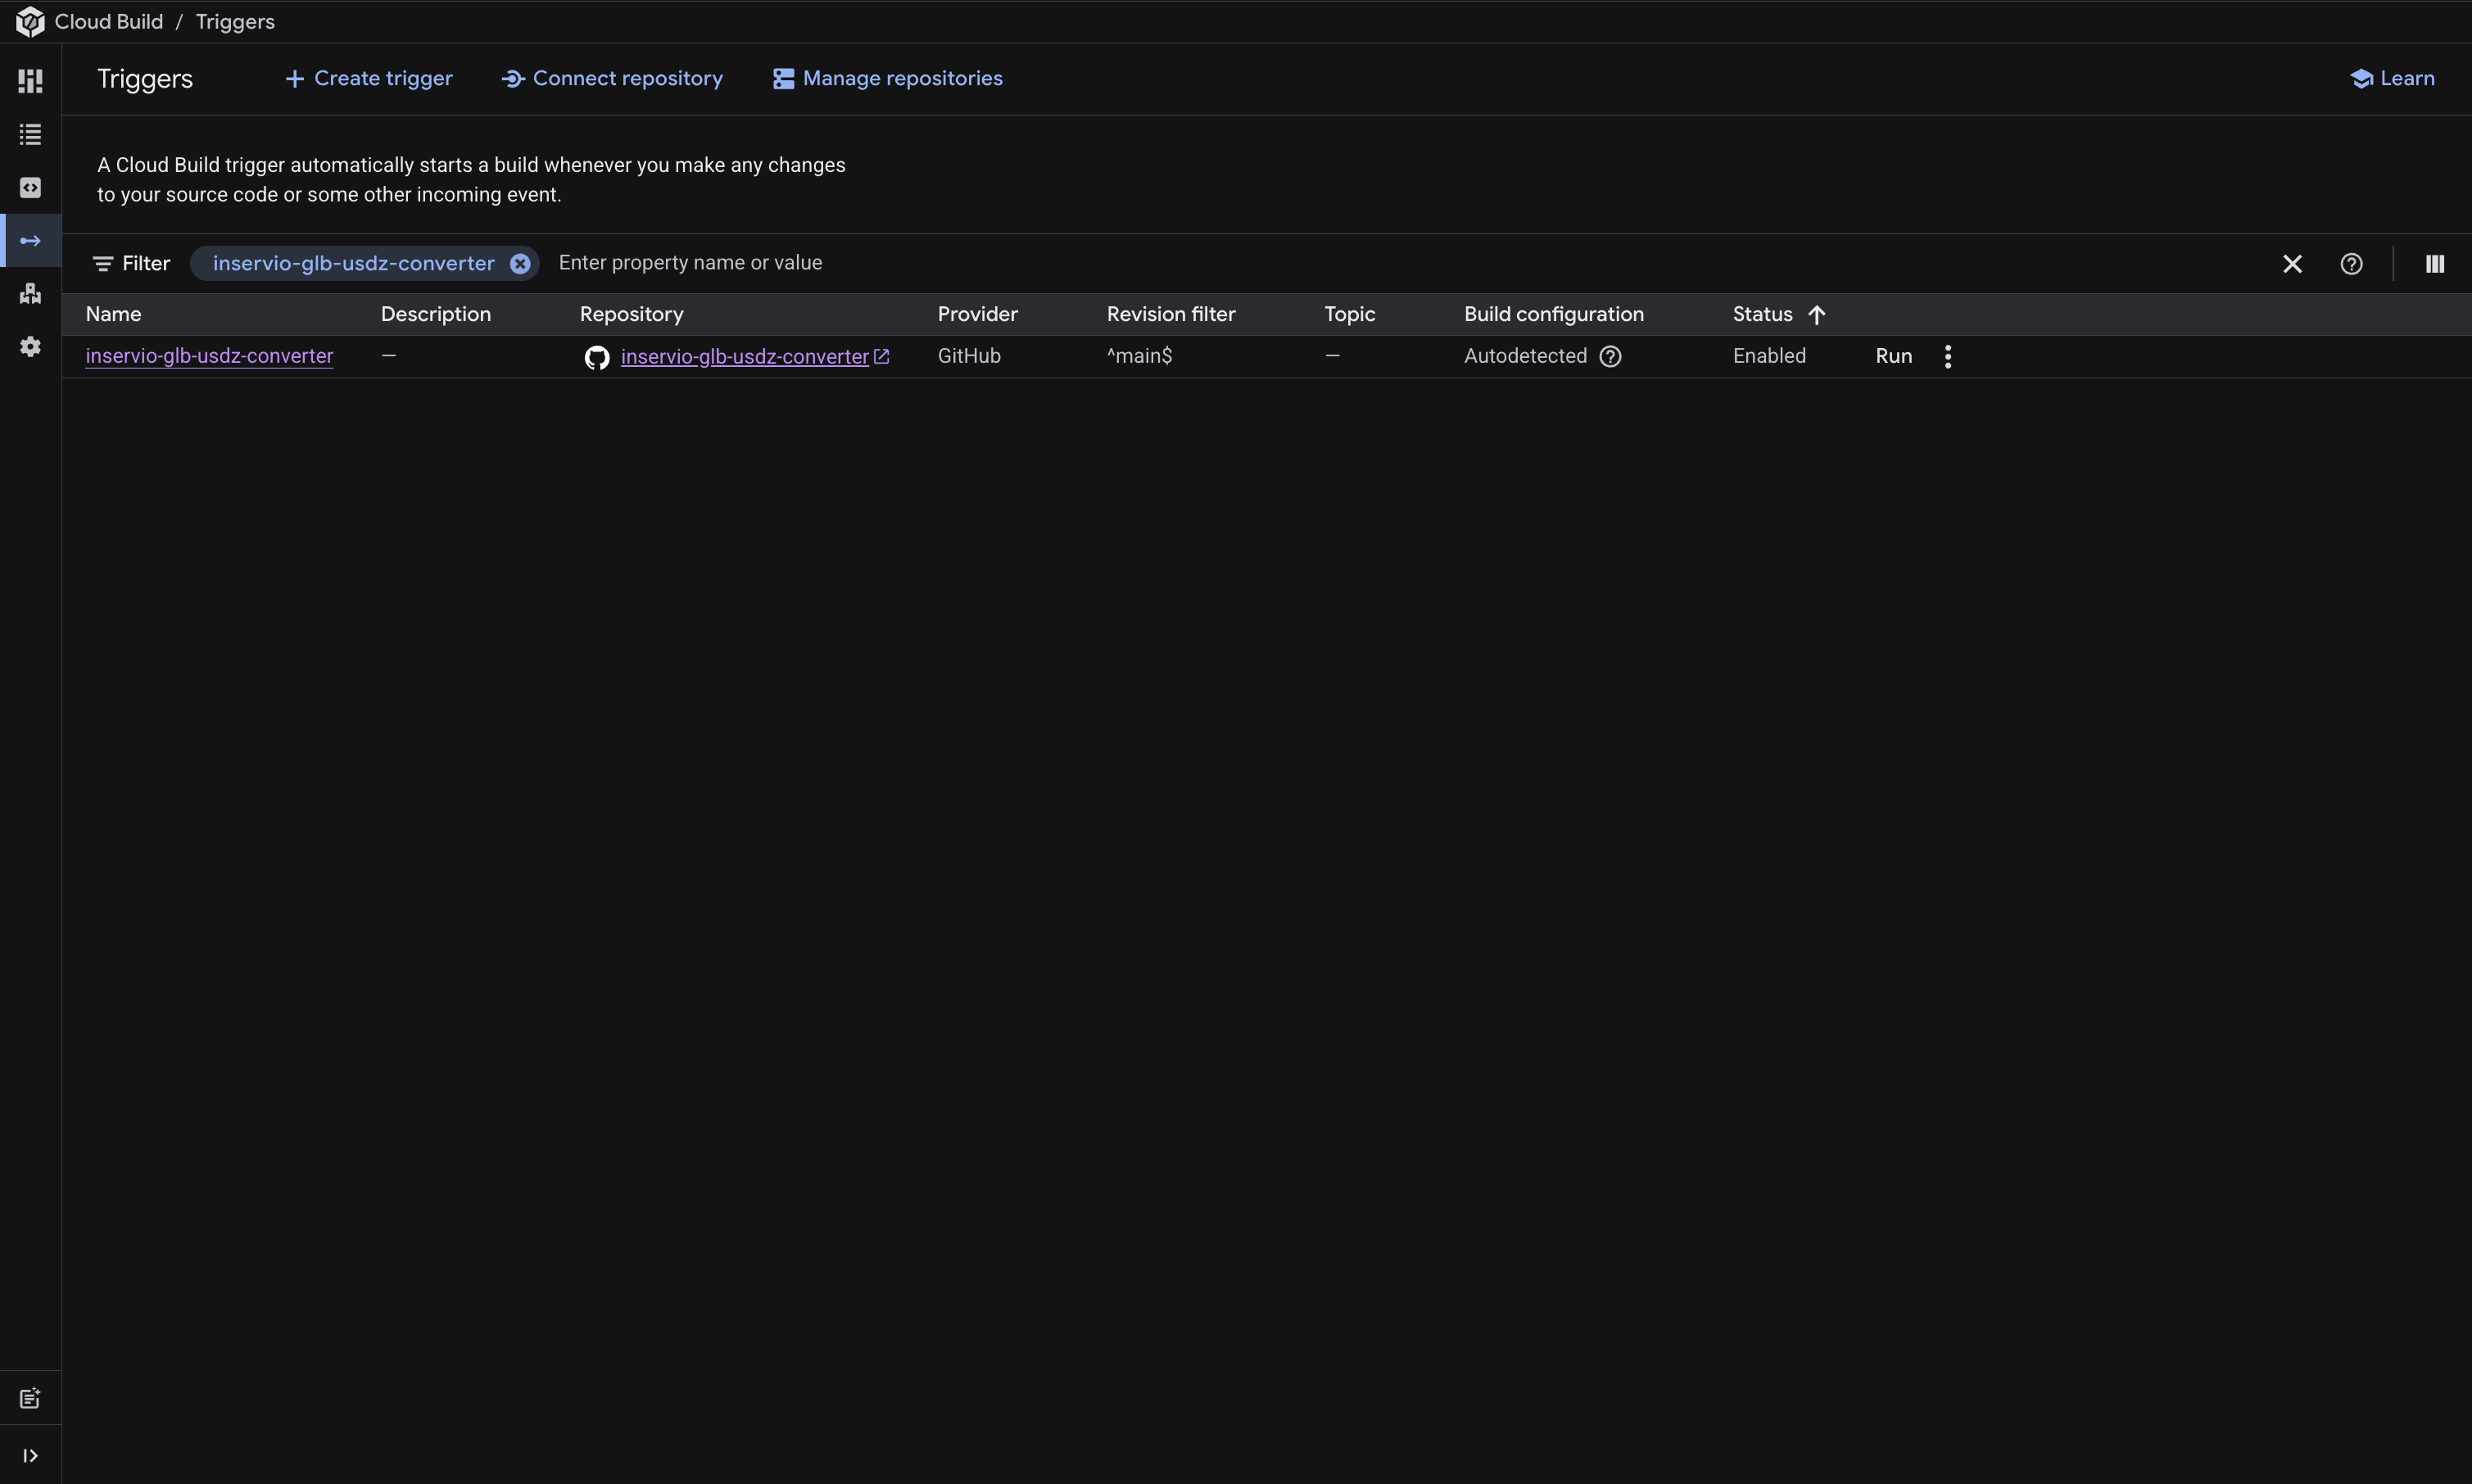
Locate your newly created trigger line item from the dashboard index management list -> Click the inline Run button positioned on the far right hand side of the asset summary row to manually force-start your container image compilation pipeline.
How to review compilation status history:
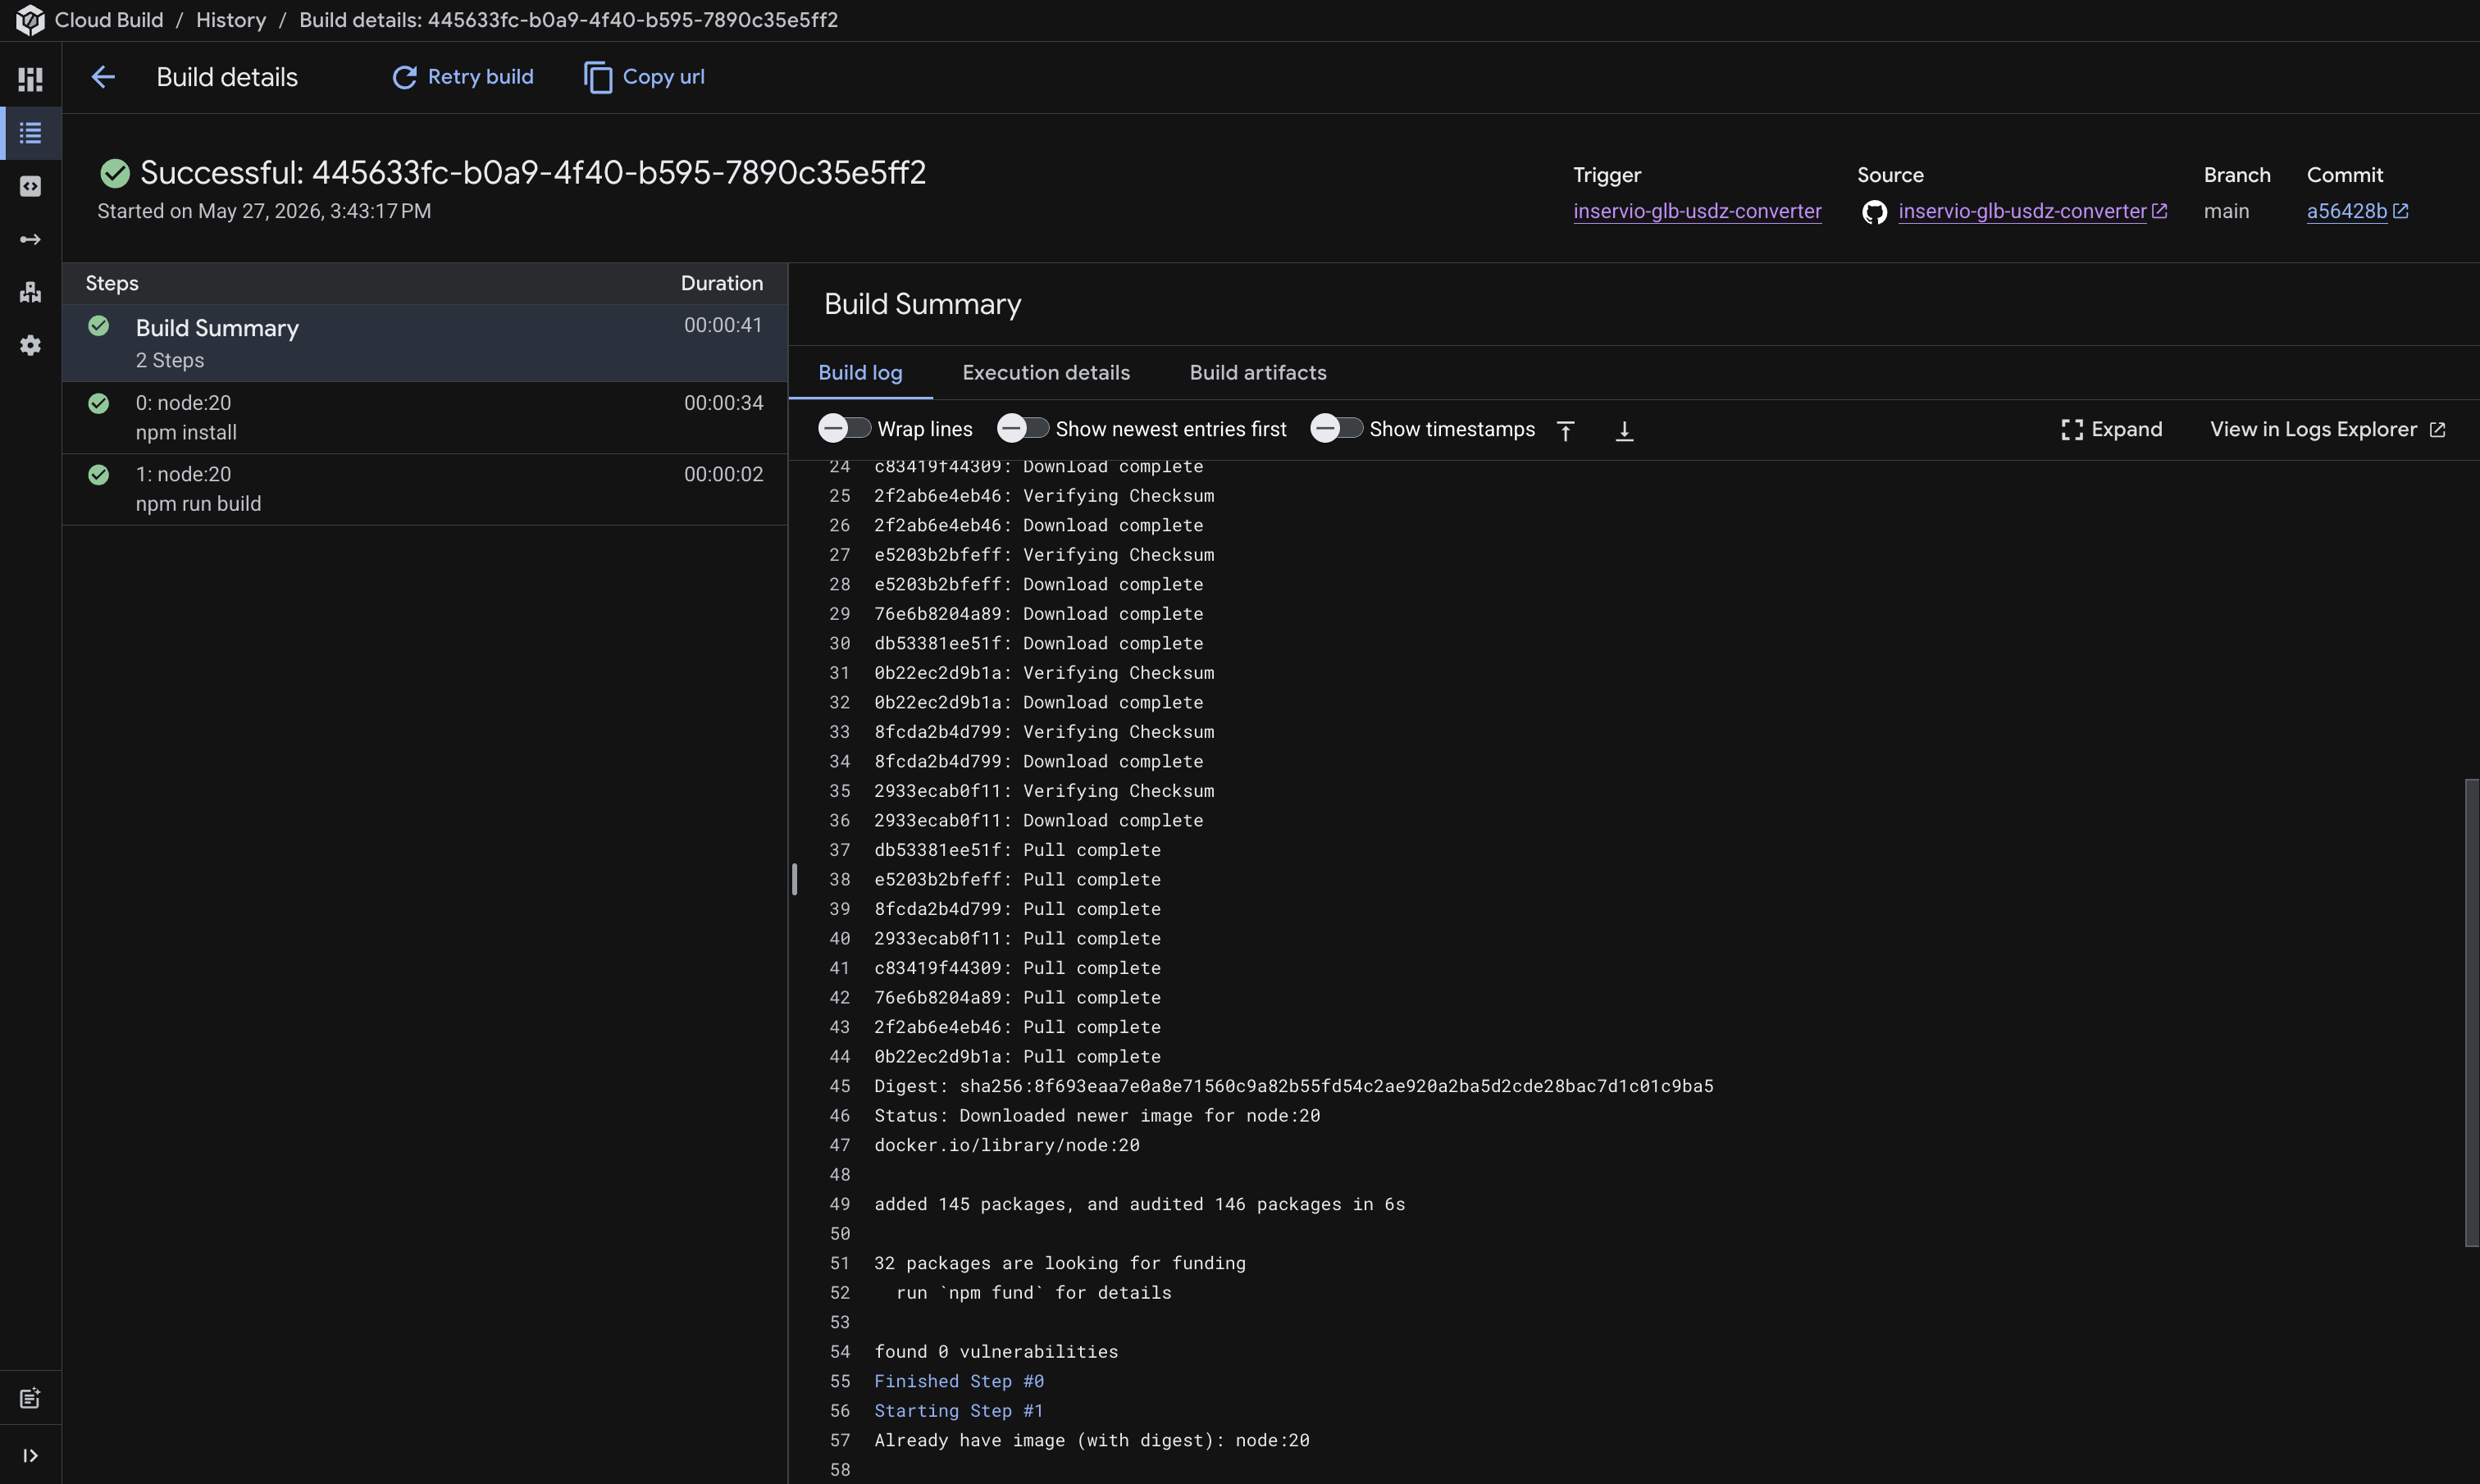
To view your automated pipeline's progress, trace standard log logs, and check for a successful build artifact output, follow this path: Main Navigation menu -> Cloud Build -> History.
When the engine finishes packaging the container architecture smoothly, the asset status row updates with a green checkmark indicating successful compilation:
Step 3: Deploy the Compiled Container Image to a Cloud Run Service
After your pipeline successfully compiles the application and stores the container artifact inside your project registry, deploy the image onto a serverless Cloud Run service infrastructure layer.
How to access and initialize the Cloud Run Service:
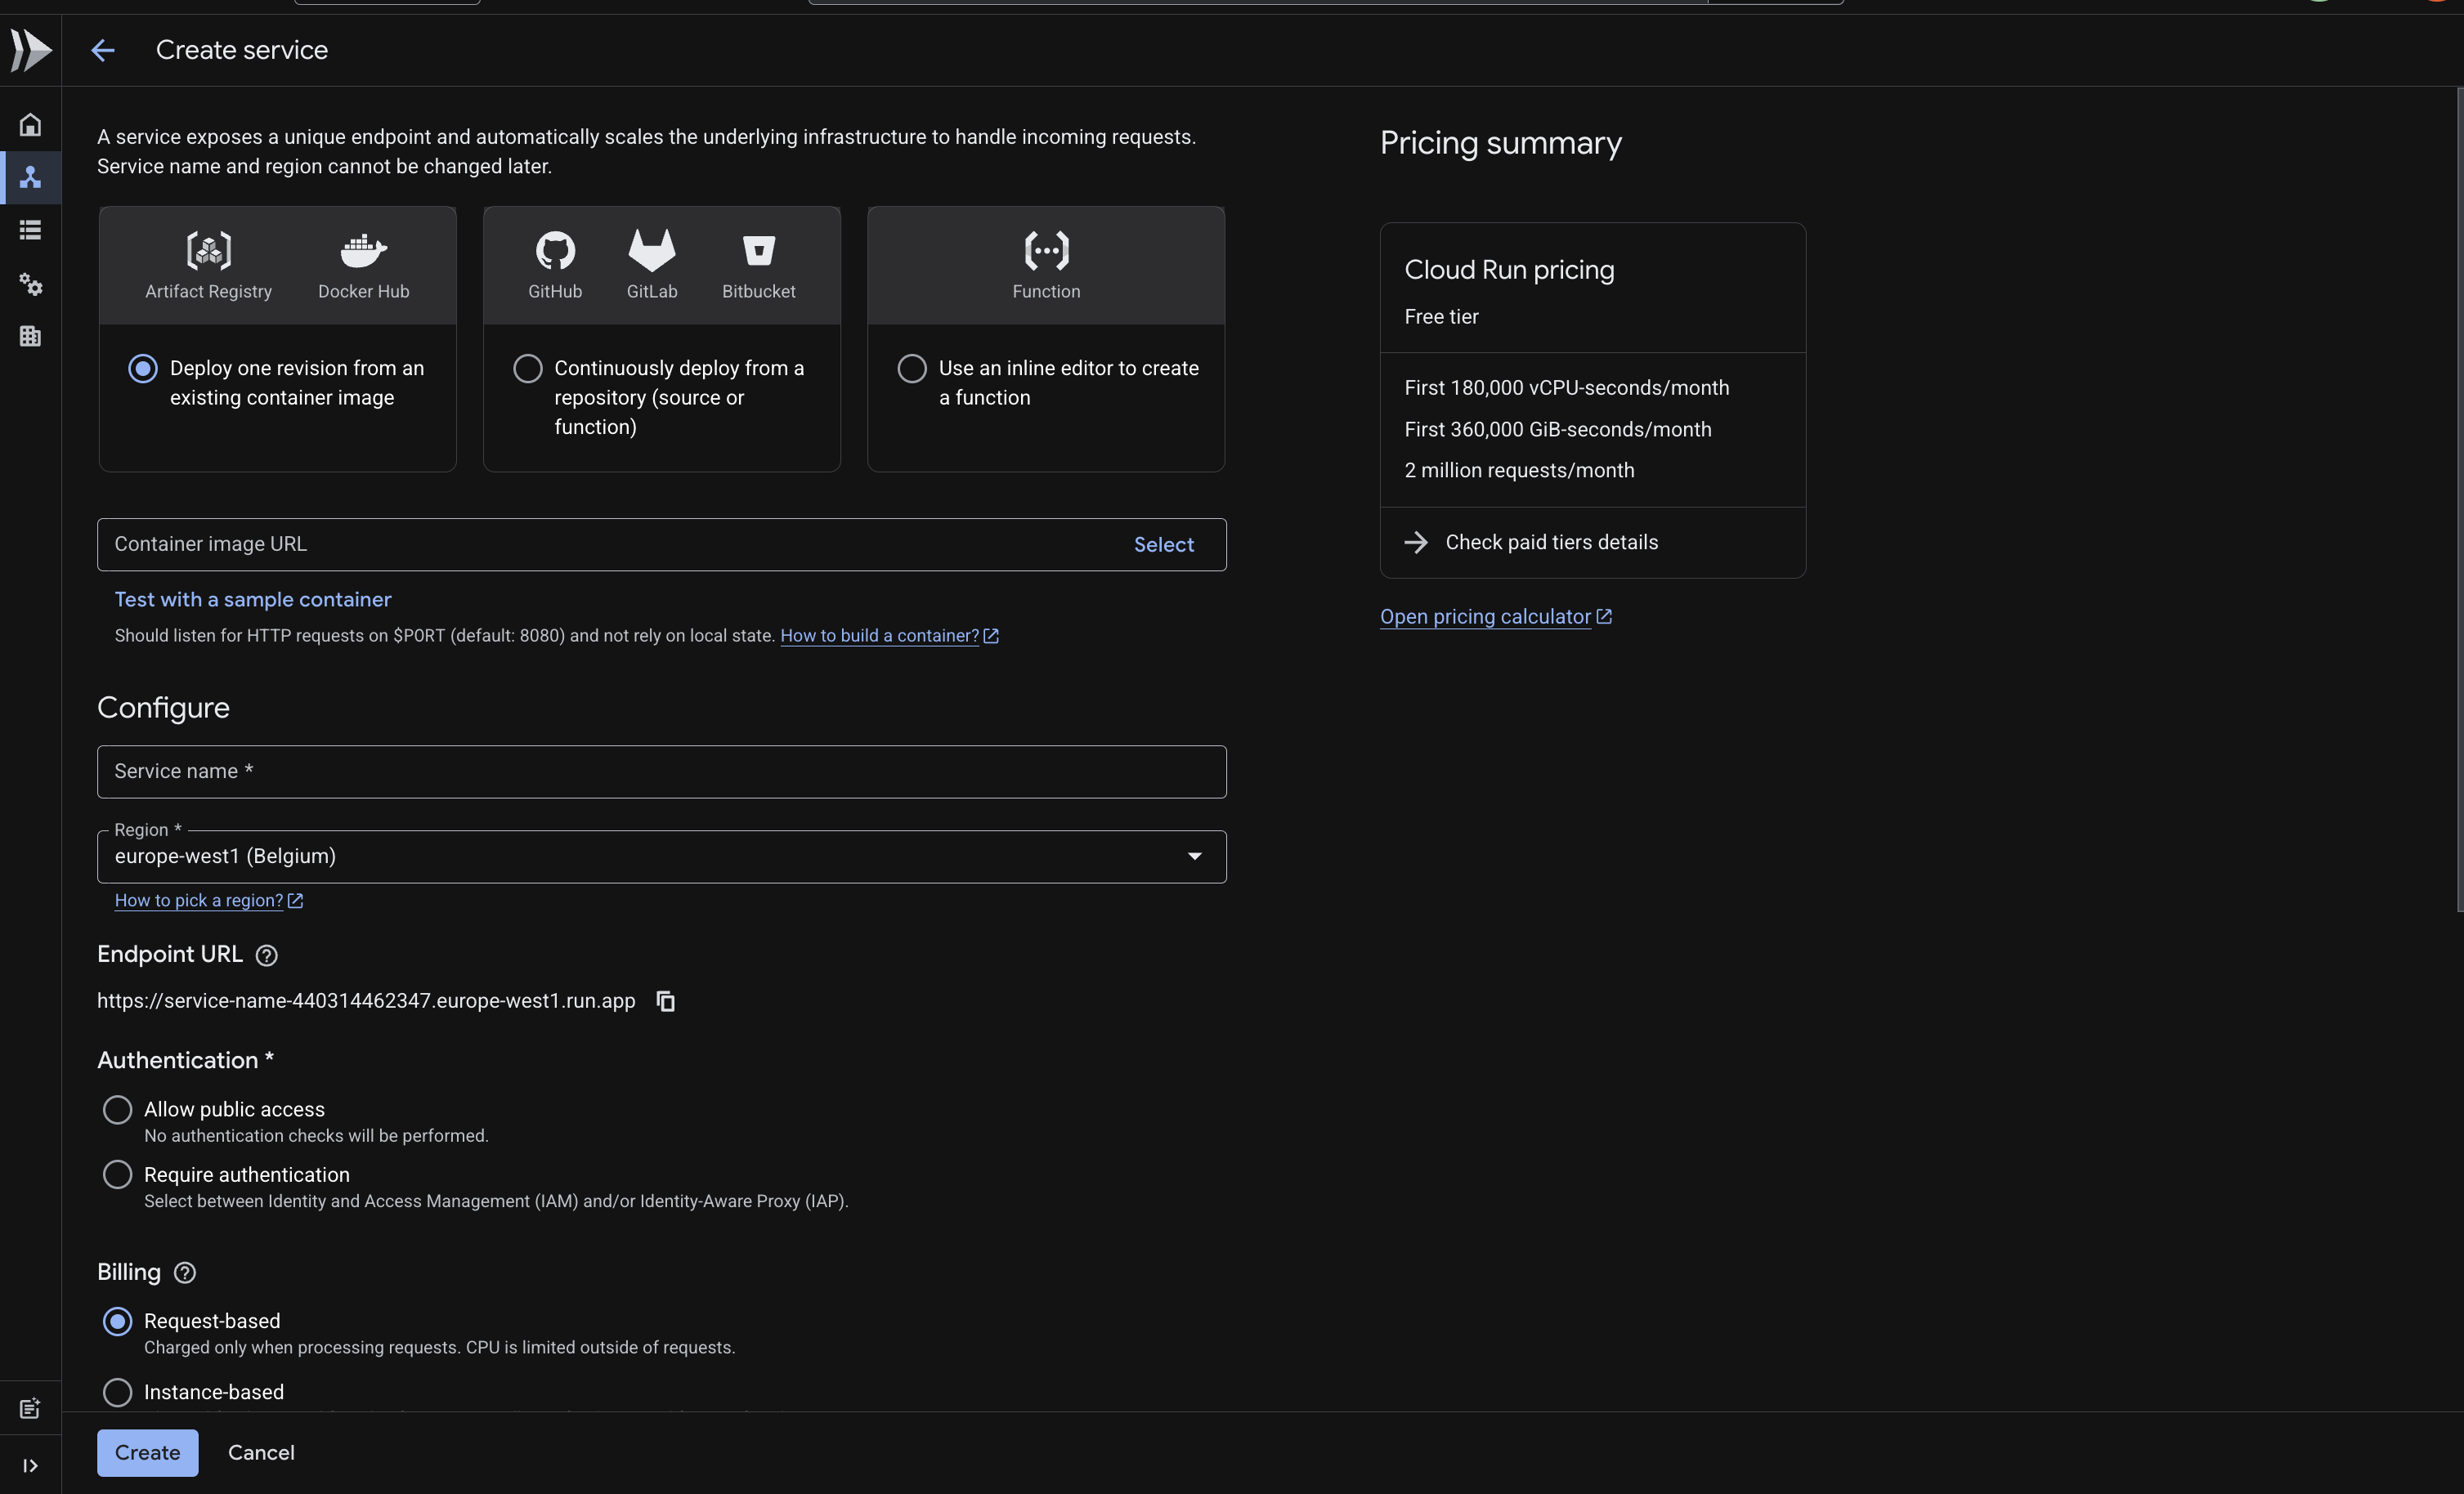
Go to the main console navigation layout: Search or scroll down to Cloud Run -> Click on the Services tab view panel -> Click the Create Service button at the top of the interface management menu.
You can also choose the Deploy Container command pathway directly inside your registry layout to load the service compilation workspace configuration view:
Step-by-step Service Creation Pipeline:
- Select Container Asset URL: Choose the first radio button option: Deploy one revision from an existing container image -> Click the input selection box -> Navigate through your registry architecture directory trees -> Select the newest unique image SHA hash tag output generated during your successful Step 2 runtime build.
- Service Settings: Provide an explicit, lowercase Service name -> Choose your low-latency geographic Region destination -> Select your preferred **Authentication** access permissions handling layer (e.g., enable Allow unauthenticated invocations if this is a public API gateway, or restrict permissions for internal services).
- Finalizing Deployment: Scroll down to configure advanced runtime thresholds if needed (such as CPU allocations, container concurrency settings, and autoscaling minimum/maximum node instances) -> Click the final Create action button at the bottom of the interface form.
- Retrieve Service Link: Wait a moment while Cloud Run allocates infrastructure instances, pulls your verified image asset, and provisions SSL configurations -> Once the service status turns green, look at the top of the details panel to find the automatically generated Endpoint URL. Your web application project is now live on that public address link.
Conclusion: Setting up this structure creates a robust, reliable pipeline. By connecting source changes automatically via Cloud Build and pushing verified artifacts down into Cloud Run serverless runtimes, your deployments remain stable, highly available, and easily scalable.